Red Velvet Cake

IMG_5523

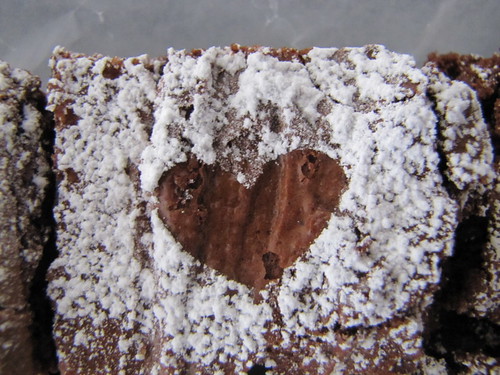
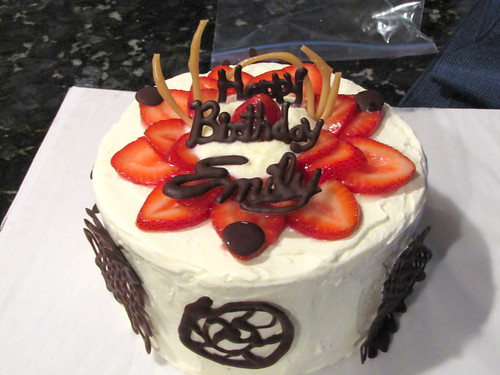
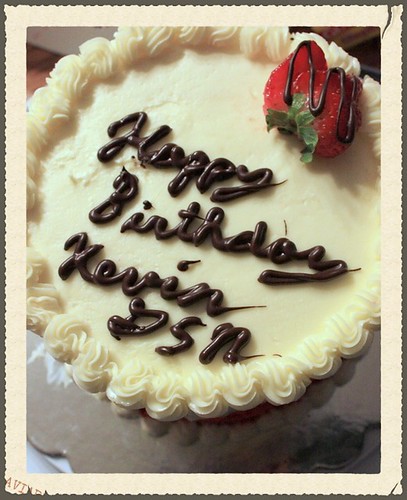
So... there's a heart inside this cake. But, I can't really prove it since, I don't have any proof shots of the inside. In the flurry of events, there was never a moment for me to take a picture of the inside of the cake. I was really tempted to cut the cake beforehand to take beautiful foodie shots for my blog check if the inside of the cake turned out decently, but giving a partially pre-cut cake didn't seem right. So, I took the cake to the party and held my breath. I can vouch though that this tutorial by IamBaker definitely works. I will hopefully have a reprise for this cake sometime in the future.
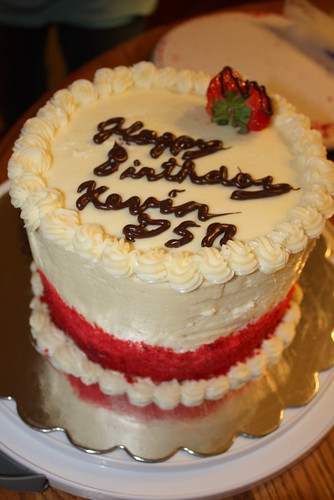
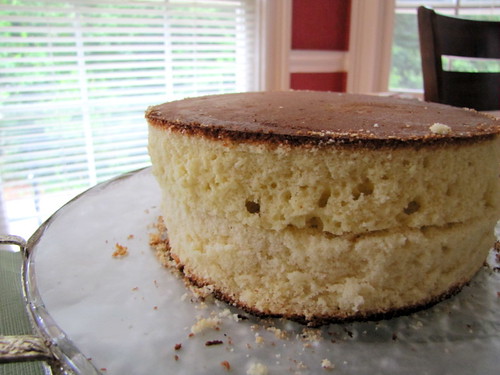
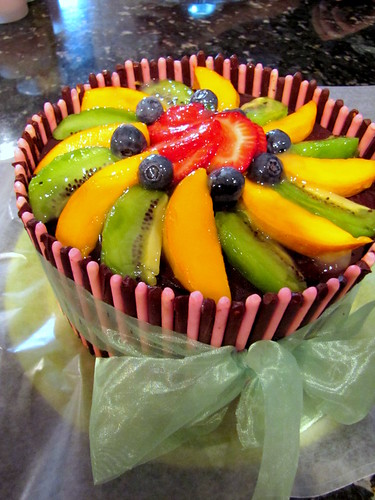
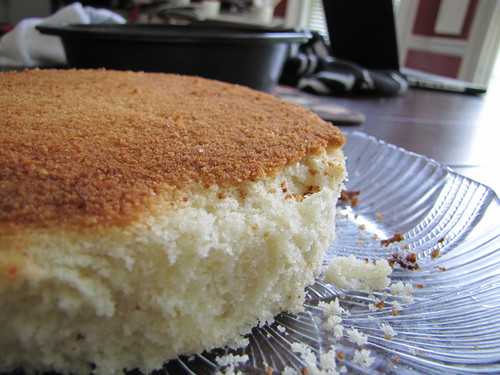
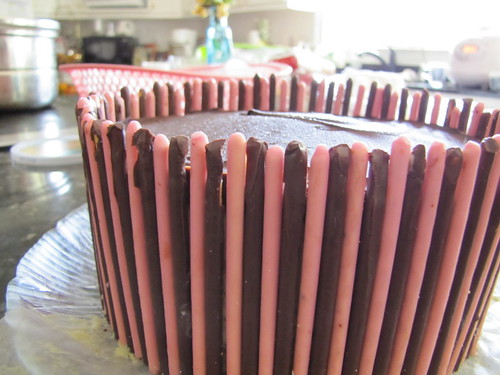
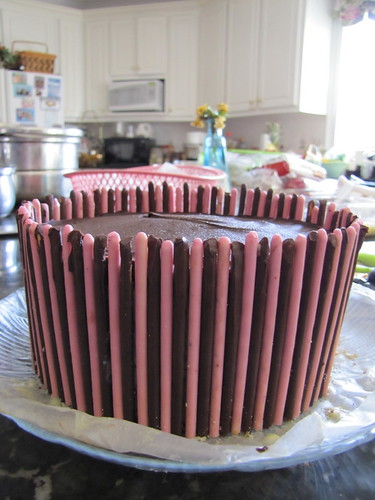
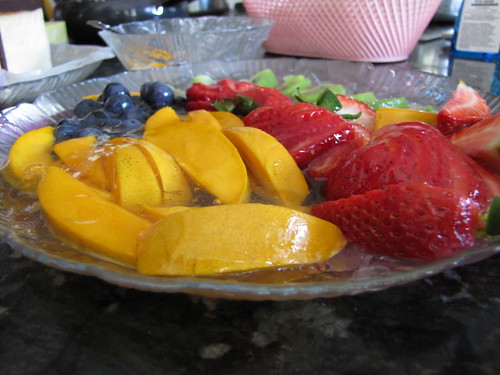
Since the inside of the cake was the main star. The outer portion of the cake was simple with a bit of piping, strawberry garnish and red-velvet crumb lining at the bottom of the cake. The red-velvet recipe was really great, having the perfect red color and cacao flavor. Also, the white cake held together really well and carved out beautifully as per the tutorial. You definitely want to plan well for this cake. I spread out the baking and assembly over two days and that made the whole ordeal a lot more manageable. I'll definitely be venturing to make this special cake again soon.

Red Velvet Cake

Adapted from SprinkleBakes
Ingredients

2.5 cups all purpose flour
1 tsp salt
2 cups of sugar
1 cup (4 sticks) softened, unsalted butter
2 large eggs
1 Tb cocoa powder
1.5 Tb liquid red food coloring
1 cup buttermilk
1 tsp vanilla extract
1/2 tsp baking soda
1 Tb white vinegar
Directions:
1.) Preheat oven to 350 degrees.
2.) Butter and flour two 9-inch cake pans.
3.) Sift flour and salt together.
4.) Beat butter and sugar until light and fluffy.
5.) Beat in eggs one at a time.
6.) Beat in vanilla.
7.) In a small bowl, mix 1.5 Tb red food coloring with 1 Tb cocoa powder to form a paste.
8.) Add paste to sugar and butter mixture.
9.) In a small bowl/ cup, combine baking soda and white vinegar. Add this foaming mixture to the batter and beat at medium-high speed to incorporate into the batter.
10.) Divide batter into prepared cake pans and bake for 25-30 minutes or toothpick comes out clean.
11.) Let cakes cool

White Cake
Adapted from Sweetapolita
Yields 4 layers of 8-inch cake
Ingredients:
3.5 cups sugar
1.5 cups(3 sticks) unsalted, softened butter
5 cups cake flour
2 Tb and 2 tsp baking powder
10 large egg whites
1.5 cups milk
2.5 tsp vanilla extract
1.5 tsp salt
Directions:
1.) Preheat oven to 350 degrees. Butter and flour four 8-inch cake pans and line with parchment paper
2.) Combine and stir egg whites, 1/2 cup of milk and vanilla in a bowl.
3.) In a large bowl, combine cake flour, baking powder and sugar.
4.) Add butter and 1 cup of milk to dry ingredient mixture. Mix on low speed until batter is moist and increase to medium speed and beat for 90 seconds.
5.) Add 1/3 of egg mixture, beat for 20 seconds. Repeat until all egg mixture is incorporated.
6.) Divide batter into prepared pans
7.) Bake for 25-35 minutes or until inserted toothpick comes out clean.

Frosting:
Double this recipe
Ingredients:
1 cup (2 sticks) softened, unsalted butter
6-8 cups powdered sugar
1.5 cup milk
2 tsp vanilla
Directions:
1.) Beat butter, 4 cups of powdered sugar, milk and vanilla at medium speed for 3 to 5 minutes.
2.) Add powdered sugar 1 cup at a time, beating for 2 minutes after each addition.

I followed the tutorial at the IamBaker blog

Assembly
1.) Crumble Red velvet cake using a fork to make cake crumbs. Add 1 cup of frosting to cake crumbs and mix well.
2.) After white cake has cooled down, wrap in plastic wrap and place in freezer for at least 2 hours or overnight.
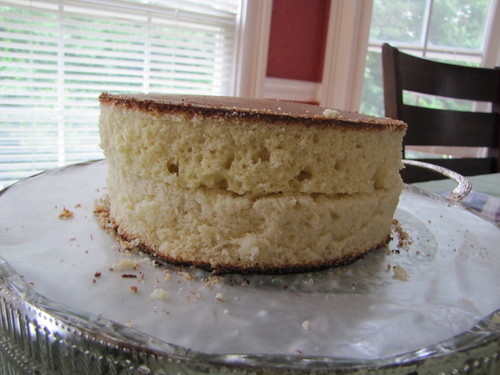
3.) Level each white cake and add about 1/2 cup of frosting on top of layer. Place another layer on top of the first layer of cake. Freeze for 2 hours. (At this point you will have two of a two-layer 8-inch cake.
4.) Carve out a cone shape from one of the two-layered cake (this will be the bottom of the heart).
5.) For the top half of the heart, carve out a well lining the periphery of the cake (please refer to IamBaker's tutorial as pictures make this step much clearer!).
6.) Frost the top sides of the cake layers.
7.) Fill the carved out wells with red velvet cake crumbs. Make sure to pack in the red velvet cake crumbs.
8.) Carefully combine the two halves of the cake, making sure to note which portion is the top half and bottom half.
9.) Frost the cake and decorate with remaining red-velvet crumbs if desired.

IMG_5540

Mini 2013 graduation cupcakes

Mini Graduation Cupcakes
The solution when you need to feed a bunch of people, but are limited in time and resources: mini cupcakes. First of all, who can say no to a mini cupcake? Not only are they cute, they tend to be much less intimidating than a full-size cupcake. I see mini cupcakes usually being gobbled up without reserve, while often times there is a moment of hesitation and battle of resolve when accepting a full-size cupcake.
They are also handy for writing messages on. Like these mini graduation cupcakes. Unfortunately, I only got to snap some quick pictures before heading out. For this version, I combined strawberry and chocolate buttercream icing before writing out the letters in white chocolate on foil. Thankfully, the message fit perfectly!

IMG_6178

IMG_6197

Version2: To make the graduation hats, I took some chocolate covered mints and and used yellow candy melts to create the tassel. I also used yellow and white candy melts to write the congrats message.

IMG_4649

Mini chocolate cupcakes
Adapted from BakingBites
Dry ingredients:
1.5 cups all purpose flour
1/2 cup cocoa powder
2 tsp instant espresso powder
1 cup sugar
1 tsp baking powder
1/2 tsp baking soda
1/4 tsp salt

Wet ingredients
3/4 cup milk
1/2 cup canola oil
1 tsp vanilla
2 tsp apple cider vinegar

Directions: 
1.) Line 48 mini muffin pan with cupcake liners.
2.) Preheat oven to 350 degrees F.
3.) Sift dry ingredients (flour, cocoa powder, instant coffee, sugar, baking powder, baking soda and salt) into large bowl.
4.) Whisk wet ingredients (milk, canola oil, vanilla, vinegar) in separate medium bowl.
5.) Stir dry ingredients into wet ingredients until just combined.
6.) Fill cupcake liners 3/4 full with batter. 
7.) Bake at 350F for 10 to 12 minutes.

Chocolate Buttercream
Chocolate Buttercream Frosting
Adapted from SavorySweetLife

Ingredients
2 sticks softened, unsalted butter
3.5 cups powdered sugar
1/2 cup cocoa powder
1/2 tsp salt
2 tsp vanilla
4 Tb milk

Directions
1.) Cream butter at medium speed. 
2.) Sift powdered sugar and cocoa into bowl and mix in at low speed. 
3.) Begin beating at medium speed and add in vanilla, salt and milk. 
4.) Beat for 3 minutes adding more sugar for thicker consistency or more milk for a more fluid consistency. 

Strawberry Buttercream
Adapted from OhSweetDay
Ingredients 
2 sticks softened, unsalted butter
2 cups powdered sugar
1 tsp vanilla
3 Tb of strawberry puree

Directions
1.) Cream butter at medium speed.
2.) Sift powdered sugar into bowl and mix in at low speed.
3.) Add 2 Tb of strawberry puree and vanilla.
4.) Beat for 3 minutes at medium speed. Add milk for more fluid consistency and add more strawberry puree to taste.

Dark Chocolate brownies

IMG_1802


This is one of my favorite go-to recipes for bake-sales. I know that many people have different ideas of the perfect brownie. Chewy, fudgy, cakey. I have a tall order for the perfect brownie. For me, the ideal brownie has a crisp top, a deep chocolate flavor, is dense, but not fudgy. This recipe from JoytheBaker is everything I'm looking for and more. I cut out hearts from parchment paper before sprinkling powdered sugar to add a heart to each brownie. 


IMG_1797
The espresso powder is optional, but I encourage you to add it for complexity in flavor. 

Dark Chocolate Brownie
Adapted from BonAppetit via JoytheBaker
Yields 24 brownies
1 and 1/3 cup all-purpose flour
1 tsp baking powder
1/2 tsp salt
12 Tb unsalted butter
3 oz coarsely chopped unsweetened chocolate
2 cups sugar
4 eggs
2 tsp vanilla
1 tsp espresso powder
1.) Preheat oven to 350 F.
2.) Butter and line a 9x13 inch baking pan with aluminum foil. Butter the foil to facilitate removal of brownies.
3.) Whisk flour, baking powder and salt in medium-sized bowl.
4.) Bring a small pot of water to a boil. Set a heatproof bowl over the boiling water (make sure the bottom does not touch the water).
5.) Add butter and chopped chocolate to heatproof bowl. Stir butter and chocolate until melted
6.) Remove bowl from hit and let cool for few minutes.
7.) In separate medium bowl, whisk sugar, eggs, vanilla and espresso powder together until pale and thick.
8.) Pour chocolate and butter mixture into egg mixture.
9.) Whisk until ingredients come together.
10.) Add flour mixture and whisk to incoporate.
11.) Bake in 9x13 pan for 30 minutes (or you can test with a toothpick, it'll come out clean when done).
 IMG_1792

Raspberry Preserve Jelly Roll

IMG_6520


Jelly rolls have always been my weakness. I can't ever seem to say no to a good jelly or cream roll. This recipe always produces a roll cake that is light, spongy and moist. Slather that with a generous layer of Raspberry preserves and a hidden strip of nutella and we have ourselves a definite winner. Strawberry jam always works well with the roll cake, but the raspberry preserves add a really wonderful tart contrast to the lightly sweet roll cake.
IMG_6495
IMG_6509

Recipe
Foolproof Jelly Roll Cake
3/4 cup APF
1 tsp Baking Powder
1/4 tsp salt
5 eggs
3/4 cup sugar
1/2 tsp vanilla
1 +1/4 cup jam
Powdered Sugar
Directions:
1.) Preheat oven to 350 degrees Fahrenehit. Grease an 18 by 13 inch baking sheet, line with parchment paper and grease parchment paper.
2.) Whisk flour, baking powder and salt in a bowl.
3.) In a separate bowl, whip eggs on medium-high, gradually adding in sugar and vanilla for about a minute. Whip mixture for 4-8 more minutes until mixture is thick and volumous.
4.)Fold in flour mixture into egg mixture.
5.)Spread batter evenly in prepared pan.
6.) Bake for 12-17 minutes, rotating pan halfway through baking.
7.)Remove cake by loosening edges, flipping cake onto a clean towel covered in powdered sugar and roll the cake into a log shape. Let cake cool for 15 minutes.
8.) Unroll cake and slather jam or desired filling on cake and reroll cake.


IMG_6503


Neapolitan Ice-Cream Cake

Neapolitan Ice-Cream Cake
Nothing screams summer like ice-cream cake. It's my favorite way to celebrate a summer birthday. I used my favorite hot-milk cake recipe for this cake and finished it with some light whipped cream. As the hot-milk cake is quite sturdy, it was an ideal choice to hold up against the strawberry and chocolate ice-cream filling. 
IMG_0752

Trimming the cake. Strawberry and chocolate ice-cream for the filling. I love the color and flavor combination of Neapolitan ice-cream.

IMG_0762

I finished the cake with some stabilized whipped cream and embellished with strawberries as well as chocolate and caramel pieces.

To make the stabilized whipped cream:
1 cup whipping cream
3 Tb powdered sugar
1 Tb cold water
1 tsp gelatin
1.) Add gelatin to cold water. Let bloom for 1 minute before microwaving for 30 seconds.
2.) In a large bowl, beat whipping cream until thick and soft peaks begin to form.
3.) Add powdered sugar gradually.
4.) Gradually increasing speed to high, add gelatin.
5.) Beat until whipped cream holds peaks.
Hot milk-cake recipe here

IMG_0797
IMG_0813

IMG_0815

Boston Cream Pie

Boston Cream Pie

IMG_2151

IMG_0044
IMG_0276
Version 1

The classic Boston Cream Pie is not really a pie as the name implies, but pastry cream sandwiched between cake layers finished with a chocolate ganache. The final product is a rich and creamy cake. I used the recipe from the cakelets featured on the HoneyandButter blog. The hot milk cake has been one of my favorite go to recipes ever since. 

I love to imagine the different ways I can decorate the cake. The ganache provides a perfect backdrop to get creative. I've made two renditions of this cake. The first was with the fruit topping and pocky featured above, while the second was lined with pirouette cookies.

CIMG2677

CIMG2683
Version 2

I used pocky sticks (alternating in strawberry and chocolate) and pirouette cookies to line the outer part of the cake. You could always have a more raw-looking version that showcases the sandwiched pastry cream filling.

Recipe
Boston Cream Pie Cake
Adapted from HoneyandButter blog

Hot Milk Sponge Cake (for two 9-inch cakes)

Ingredients
3 cups flour
3 tsp baking powder
3 tsp salt
2 cups sugar
6 large eggs
1 cup milk
12 Tb butter
2 tsp vanilla extract

Directions
1.) Preheat oven to 350 Fahrenheit.
2.) Grease and flour two 9-inch cake pans.
3.) Combine the flour, baking powder and salt in bowl A.
4.) Add the milk and butter to a saucepan and bring to a boil on low heat.
5.) Beat the eggs and sugar on high speed for 4 to 5 minutes using a stand or hand-held mixer. Beat until ribbon stage or the mixture is lightened in color and the batter falls slowly like a ribbon when the beater is lifted up.
6.) Gradually whisk in the dry ingredients until just incorporated.
7.) With mixer on low speed, slowly add the hot milk mixture to the batter and mix just until smooth.
8.) Add vanilla to batter and mix in.
9.) Distribute batter to cake pans.
10.) Bake for 35 to 40 minutes or until toothpick comes out clean.
11.) Let cool on wire rack.
IMG_2014
IMG_0743
hot milk sponge cake

Pastry cream
** make this at least 3 hours ahead of time
Ingredients
2 cups of milk or half and half
1/2 up sugar
5 large egg yolks
3 Tb cornstarch
4 Tb unsalted butter (cold and cubed)
1.5 tsp vanilla extract or 1 vanilla bean

1.) In a saucepan over medium-high heat, bring the milk, salt and 6 Tb of sugar to a simmer with occasional stirring.
2.) In a separate bowl, whisk egg yolks and 2 Tb of sugar until sugar begins to dissolve. Whisk in cornstarch for about 30 seconds until mixture is pale yellow and thick.
3.) When milk mixture is brought to a simmer, gradually add to the egg yolk mixture while whisking to temper.
4.) When all combined, add the mixture back to the saucepan. With constant whisking, bring to a simmer until the mixture is thick and glossy and a few bubbles burst on the surface.
5.) Bring mixture off the heat and whisk in butter and vanilla.
6.) Strain pastry cream into a separate bowl.
7.) Cover with cling-wrap, with the cling-wrap directly adhering to the surface of the pastry cream.
8.) Refrigerate for at least 3 hours or preferably over-night.

Chocolate Ganache
1/2 cup heavy cream
8 oz chopped chocolate

1.) Microwave heavy cream and chocolate in 30 second increments and stir in between.

Sugar Syrup (for fruit)
1/2 cup sugar
1/2 cup water

1.) Bring water and sugar to a bowl over medium-high heat.
2.) Turn heat to low and continue to heat mixture for 3 to 5 minutes with stirring in between.
3.) Take off heat ensuring that sugar crystals are all dissolved.

Assembly of Boston Cream Pie cake
1.) Level hot milk cakes with serrated knife
2.) Fill middle layer with pastry cream. If you have a cake collar, it may come in handy at this point as the weight of the cake tends to cause the pastry cream to ooze out.
3.) Spread chocolate ganache, while still warm, to the top of the cake.
4.) Refrigerate for 1 hour.
5.) When ganache has set, line the circumference of the cake with pirouettes, pocky, kit-kats, etc.
6.) Coat decorative fruit with sugar syrup and arrange as desired.


IMG_2148IMG_0048

IMG_0054
IMG_0040
fruit covered in sugar syrup


IMG_0260


Panda Bread

IMG_5207
Panda Bread
IMG_5232
I've been meaning to post on panda bread for awhile. Unfortunately, I only had a chance to make this once and was so concentrated on doing it right that I didn't take any pictures of the steps. But the pictures at the blog perfect pandas has a set of pictures that'll make the whole process perfectly clear! I was mind-boggled the first time that I heard about panda bread, but fear not, it's really about clever arrangement of different flavored dough. Totally doable! I'll be completely honest and say that the bread itself turned out a bit dry for me, but the panda design is so cute that that's easy to overlook. Happy Baking!
I admit that some of them ended up looked more like foxes. ^^;

Recipe adapted from perfectpandas with converted measurements
Ingredients:
1 + 1/3 cups (230g) bread flour
1/2 cup + 1Tb (70g) cake flour
2.5 Tb (30g) sugar
3/4 cup milk (210 g) + 1 yolk
3/4 tsp salt
5/4 Tb unsalted butter
1/2 Tb (4g) yeast
8g matcha dissolved in 10g hot water
8g cocoa powder dissolved in 8g hot water

Directions
1.)Beat yolk and milk lightly and microwave for 30 seconds or heat to 38 degrees Celsius.
2.)Place bread flour, cake flour, sugar, salt, butter, yeast and the milk and egg yolk mixture to the bread machine. Set on dough cycle, kneading for 20 minutes. Restart the dough cycle and knead for 15 minutes.
3.) Divy up dough as follows: 210 g plain, 75g chocolate and remainder for matcha.
4.) Add cocoa mixture to the dough of 75 g and knead to distribute. Add green tea mixture to the reserved ball of dough and knead to distribute.
5.) Place the balls of dough in separate greased bowls/ plates and cover loosely with oiled cling-wrap. Let dough proof for 30-40 minutes.
6.)Punch air out of the dough and proof for another 20-30 minutes.
7.) *you may want to refer to the picture tutorial for the assembly*
Take 90 g of the plain dough. This will be the face of the panda. Use two pieces of 27g chocolate dough rolled lengthwise as the eyes of the face.
8.) Add a strip of 30 g plain dough between the eyes of the panda.
9.) Envelope the face with the remaining plain dough. Add two pieces of 17.5 g chocolate dough for the ears.
10.) Add 70 g of the matcha dough for the space between teh ears.
11.) Wrap the rest of the matcha dough around the current lough.
12.) Place dough in greased loaf pan, cover with oiled cling wrap and proof for 50-60 minutes.
13.)Bake at 392 F for 25 to 30 minutes.
14.)Let cool and cut loaf (recommend with a serrated knife) to see panda face! :)
IMG_5196
CIMG2738
The loaf from the oven~ I thought I had messed up when I first saw it like this xD.